I love Before and Afters, don’t you? I don’t know that I’ve gotten such a good “after” for less than $10 in quite a while, if ever!
 Let’s start with the before. Our brass fireplace face.
 Shiny. Outdated. Reflective. See the brass reflection on the paint? I hated it. We worked so hard to paint this room, the mantle, (some of) the trim, and yet here was that stinkin’ fireplace face. Staring at me with it’s shiny eyes.
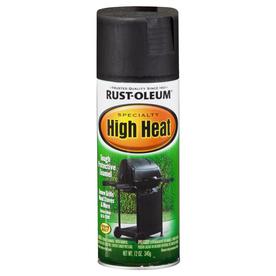
 Well, I finally had enough. I had read before that you could use High Heat spray paint to transform the fireplace face. So on one of our trips to Lowe’s a few weekends ago, I picked up a can- in white! Hooray!
I was so glad they had white because it would match the mantle. And even though black would’ve been ok, it would’ve darkened a room that I already struggle to brighten.
 The hubs removed the face and I began the process of cleaning and taping off of the doors. Folks, this took a while. And wasn’t even necessary (the taping off of the doors- I’ll discuss later). But I am nothing if not thorough and detail-oriented. I used Greenworks and a rag to clean it off, then lightly sanded the surface per instructions on the can.
 We didn’t remove the linked-screens, and I didn’t want them white (I didn’t want them to stand out- they are not pretty) so I wrapped a trash bag around each.
 Then I began the spray painting! I was so thankful for my spray paint gun- it saved my finger.
I started with the doors down, so that when I flipped them it wouldn’t damage any paint that would be exposed on the front. Then I went to the face. And about 2/3 the way through, I ran out of paint. So I ran back to Home Depot this time for another can. I finished it up and after a few hours of drying the hubs set to re-installing.
Except that several pieces were missing even when he removed it. Poor guy he tried to rig it up so the doors would be on, but eventually we called it a night (actually, I had already fallen asleep on the couch).
Fortunately, the face was back on, and more sturdy than before. After glancing at the pieces we did have, we decided that we genuinely liked it better without the doors. It seemed more open and modern. Remember, the linked screens are still on for safety for when we do make a fire!

 So to complete the project he stacked up some wood on the rack and I cleaned the face. Yup- with Greenworks and a paper towel. This was one of my concerns- that ash would stain on white- so I was so relieved.
And now we have a lovely white fireplace face! It is so much better and so crisp, clean, and modern!
Here’s the before one more time:
This project was so worth the time and frustration. And you could have less frustration if your fireplace surround is easier to assemble! What a difference less than $10 of spray paint made!
What do you think? Do you have a fireplace face that needs updating? Have you done any spray paint projects lately?
Throwback Thursday update: It is a little blotchy-looking at times. I think another coat of spray paint would’ve been good. Still, it looks great and so much better than brass!


